Why the 7-Layer Dip Reigns Supreme at Every Gathering
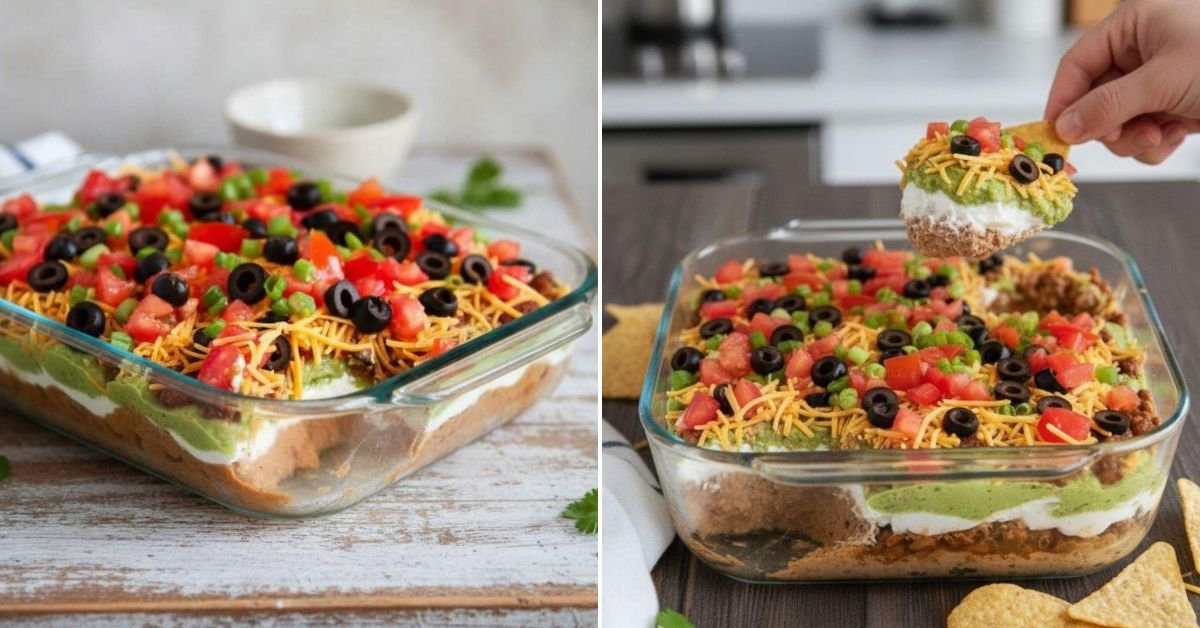
In the grand pantheon of party food, few dishes command as much adoration and nostalgic delight as the classic 7-Layer Dip. It's more than just a dip; it's a vibrant, multi-textured edible landscape that promises a burst of flavor with every scoop. Whether it's a bustling game day, a casual family potluck, or an impromptu get-together, this
easy 7-layer dip recipe consistently steals the show, disappearing faster than you can say "extra chips, please!"
This iconic appetizer has earned its legendary status for good reason. It’s deceptively simple to assemble, budget-friendly, and universally loved. The beauty of this dish lies in its layered approach, where each component contributes its unique texture and taste, culminating in a harmonious symphony of Mexican-inspired flavors. Forget complex cooking; with this 7 layer dip recipe, you're essentially stacking deliciousness, yet the result feels incredibly special. In just about 15 minutes of hands-on prep, you can create a show-stopping centerpiece that guarantees satisfied smiles and empty platters.
Unpacking the Perfect 7-Layer Dip Recipe: Essential Ingredients
The magic of the 7-Layer Dip truly lies in its distinct, well-chosen layers. Each one plays a crucial role in creating the irresistible balance of fresh, creamy, and zesty flavors. Here’s a detailed look at the core components and how to perfect each one:
Layer 1: The Robust Base – Seasoned Refried Beans
This is the foundation of your dip, so don't skimp on flavor! While canned refried beans are a fantastic shortcut, a little seasoning goes a long way.
- What you need: A 16-ounce can of refried beans.
- Pro Tip: Enhance the flavor by mixing in a tablespoon of taco seasoning, a pinch of garlic powder, or a dash of hot sauce. You can even warm them slightly before spreading to make them easier to work with, but ensure they cool before adding subsequent layers.
Layer 2: The Zesty Creaminess – Taco-Seasoned Sour Cream
This layer elevates plain sour cream into something truly special, adding a tangy, savory punch that balances the richness of the other ingredients.
- What you need: One 8-ounce container of sour cream and a 1-ounce packet of taco seasoning mix.
- Pro Tip: For extra richness and stability, some recipes suggest blending in a softened block of cream cheese with the sour cream and taco seasoning. If you go this route, ensure the cream cheese is at room temperature for a smooth, lump-free mixture. Use a hand mixer or whisk vigorously until completely combined.
Layer 3: The Fresh Heart – Homemade Guacamole
A truly great 7-Layer Dip hinges on fresh, vibrant guacamole. While store-bought options exist, homemade is surprisingly quick and undeniably superior.
- What you need: 2-3 ripe avocados, 1/4 cup chopped fresh cilantro, 1/4 cup salsa, 1.5 tablespoons fresh lime juice, 1/4 teaspoon garlic salt, ground black pepper to taste.
- How to make it: Mash the peeled and pitted avocados, then stir in the remaining ingredients until well combined.
- Pro Tip: The lime juice is not just for flavor; it's your best friend in preventing oxidation (browning). Ensure your guacamole layer is completely covered by the subsequent layers to minimize air exposure, or press plastic wrap directly onto its surface if making ahead. Store-bought guacamole often has preservatives that help it last longer, but nothing beats the taste of fresh.
Layer 4: The Tangy Kick – Bright Salsa
This layer adds essential moisture, tang, and a burst of tomatoey freshness.
- What you need: Your favorite salsa – medium or mild, chunky or smooth.
- Pro Tip: For crisp layers and to prevent your dip from becoming watery, always drain excess liquid from your salsa before spreading it. A fine-mesh sieve works perfectly.
Layer 5: The Cheesy Comfort – Shredded Cheese
What's a dip without cheese? This layer provides that satisfying, salty, and creamy texture.
- What you need: 2 cups shredded Mexican cheese blend, cheddar, or Monterey Jack.
- Pro Tip: While pre-shredded cheese is a convenient time-saver, shredding your own from a block often results in a creamier melt and fresher flavor.
Layer 6: The Briny Burst – Sliced Olives
Classic black olives add a distinct savory, briny note and a pop of color.
- What you need: One small can of sliced black olives, drained.
- Pro Tip: Ensure they are well-drained to avoid introducing excess liquid to your dip.
Layer 7: The Fresh Finish – Green Onions (and optional extras)
The final flourish adds a mild oniony bite and visual appeal.
- What you need: 1 bunch green onions, finely chopped.
- Optional Fresh Toppings: Consider adding diced Roma tomatoes, shredded lettuce for crunch, or a sprinkle of fresh cilantro for extra vibrancy.
Crafting Your Masterpiece: Step-by-Step Assembly & Pro Tips
Assembling your 7-Layer Dip is a straightforward process, but a few key techniques ensure beautiful presentation and easy scooping.
The Assembly Process
For the best results, use a 2-quart casserole dish or a 9x9-inch square dish. This size ensures your layers are thick and distinct, making for a more satisfying dip. A larger dish will spread the ingredients too thin.
- Bean Base: Spread the seasoned refried beans evenly across the bottom of your chosen dish.
- Creamy Layer: Carefully spoon and spread the taco-seasoned sour cream mixture over the refried beans. Take your time to create a smooth, even layer.
- Guacamole Goodness: Gently spread the homemade guacamole over the sour cream. Again, ensure even coverage.
- Salsa Splash: Top with the drained salsa, spreading it carefully so as not to disturb the guacamole.
- Cheesy Blanket: Sprinkle a generous layer of shredded cheese over the salsa.
- Olive Accents: Distribute the sliced black olives evenly over the cheese.
- Green Garnish: Finish with a scattering of chopped green onions.
Insider Tips for a Flawless Dip
- Chill Out: While this dip is quick to make, allowing it to chill in the refrigerator for at least 30 minutes (or ideally an hour or two) before serving helps the flavors meld and the layers set. This makes for cleaner scooping.
- The Right Scoop: Serve with sturdy tortilla chips – the thicker, restaurant-style chips are perfect for navigating all seven delicious layers without breaking. For a lighter option, offer a platter of crunchy vegetable sticks like carrots, celery, and bell peppers.
- Guacamole Protection: To minimize browning, ensure the guacamole is completely covered by the subsequent layers. If making ahead, press plastic wrap directly onto the guacamole layer before adding other toppings or storing.
Beyond the Classic: Creative Variations & Make-Ahead Magic
While the classic 7-Layer Dip is perfect as is, it's also wonderfully versatile, inviting customization to suit any taste or occasion.
Elevate Your Dip with Exciting Variations
Don't be afraid to experiment and make this
classic 7-layer dip recipe truly your own!
- Spice It Up: For those who love a kick, finely dice some pickled jalapeños and sprinkle them over the cheese layer, or mix a dash of hot sauce into the refried beans.
- Add More Freshness: After the green onions, consider adding a thin layer of finely shredded iceberg lettuce for a cool crunch, or diced bell peppers for extra color and crispness. A final sprinkle of fresh cilantro always brightens the flavor profile.
- Make It Meaty: Transform your dip into a heartier offering by adding a layer of seasoned ground beef or turkey. Brown the meat, drain any fat, and season it with taco seasoning before spreading it as a layer, often after the beans or the sour cream.
- Vegan/Vegetarian Friendly: Swap out traditional sour cream for a plant-based alternative, ensure your refried beans are vegetarian (some contain lard), and use a good quality vegan shredded cheese.
Mastering the Art of Make-Ahead
One of the most appealing aspects of this 7 layer dip recipe is its ability to be prepared in advance, making party planning a breeze.
- Partial Assembly is Key: You can assemble the refried beans, sour cream mixture, and even the guacamole (with extra lime juice and covered tightly) up to 24 hours in advance. For best results, it's often wise to hold off on adding the salsa, cheese, olives, and green onions.
- Store Separately: Prepare your salsa (drained), shredded cheese, olives, and green onions, and store them in separate airtight containers in the refrigerator.
- Just Before Serving: About 30-60 minutes before your guests arrive, complete the final layers. This ensures the freshest taste, crisp textures, and prevents any sogginess. For more in-depth strategies, check out our guide on Make Ahead 7-Layer Dip: Tips for Perfect Layers.
Conclusion
The Easy 7-Layer Dip stands as a testament to the power of simple ingredients combined with smart layering. It's more than just a dish; it's a guaranteed crowd-pleaser that evokes smiles, brings people together, and quickly becomes a cherished memory at any event. With this comprehensive 7 layer dip recipe, you're now equipped to create your own ultimate party appetizer – one that is fresh, creamy, zesty, and utterly irresistible. So, get your chips ready, unleash your inner chef, and prepare to watch this culinary classic disappear!